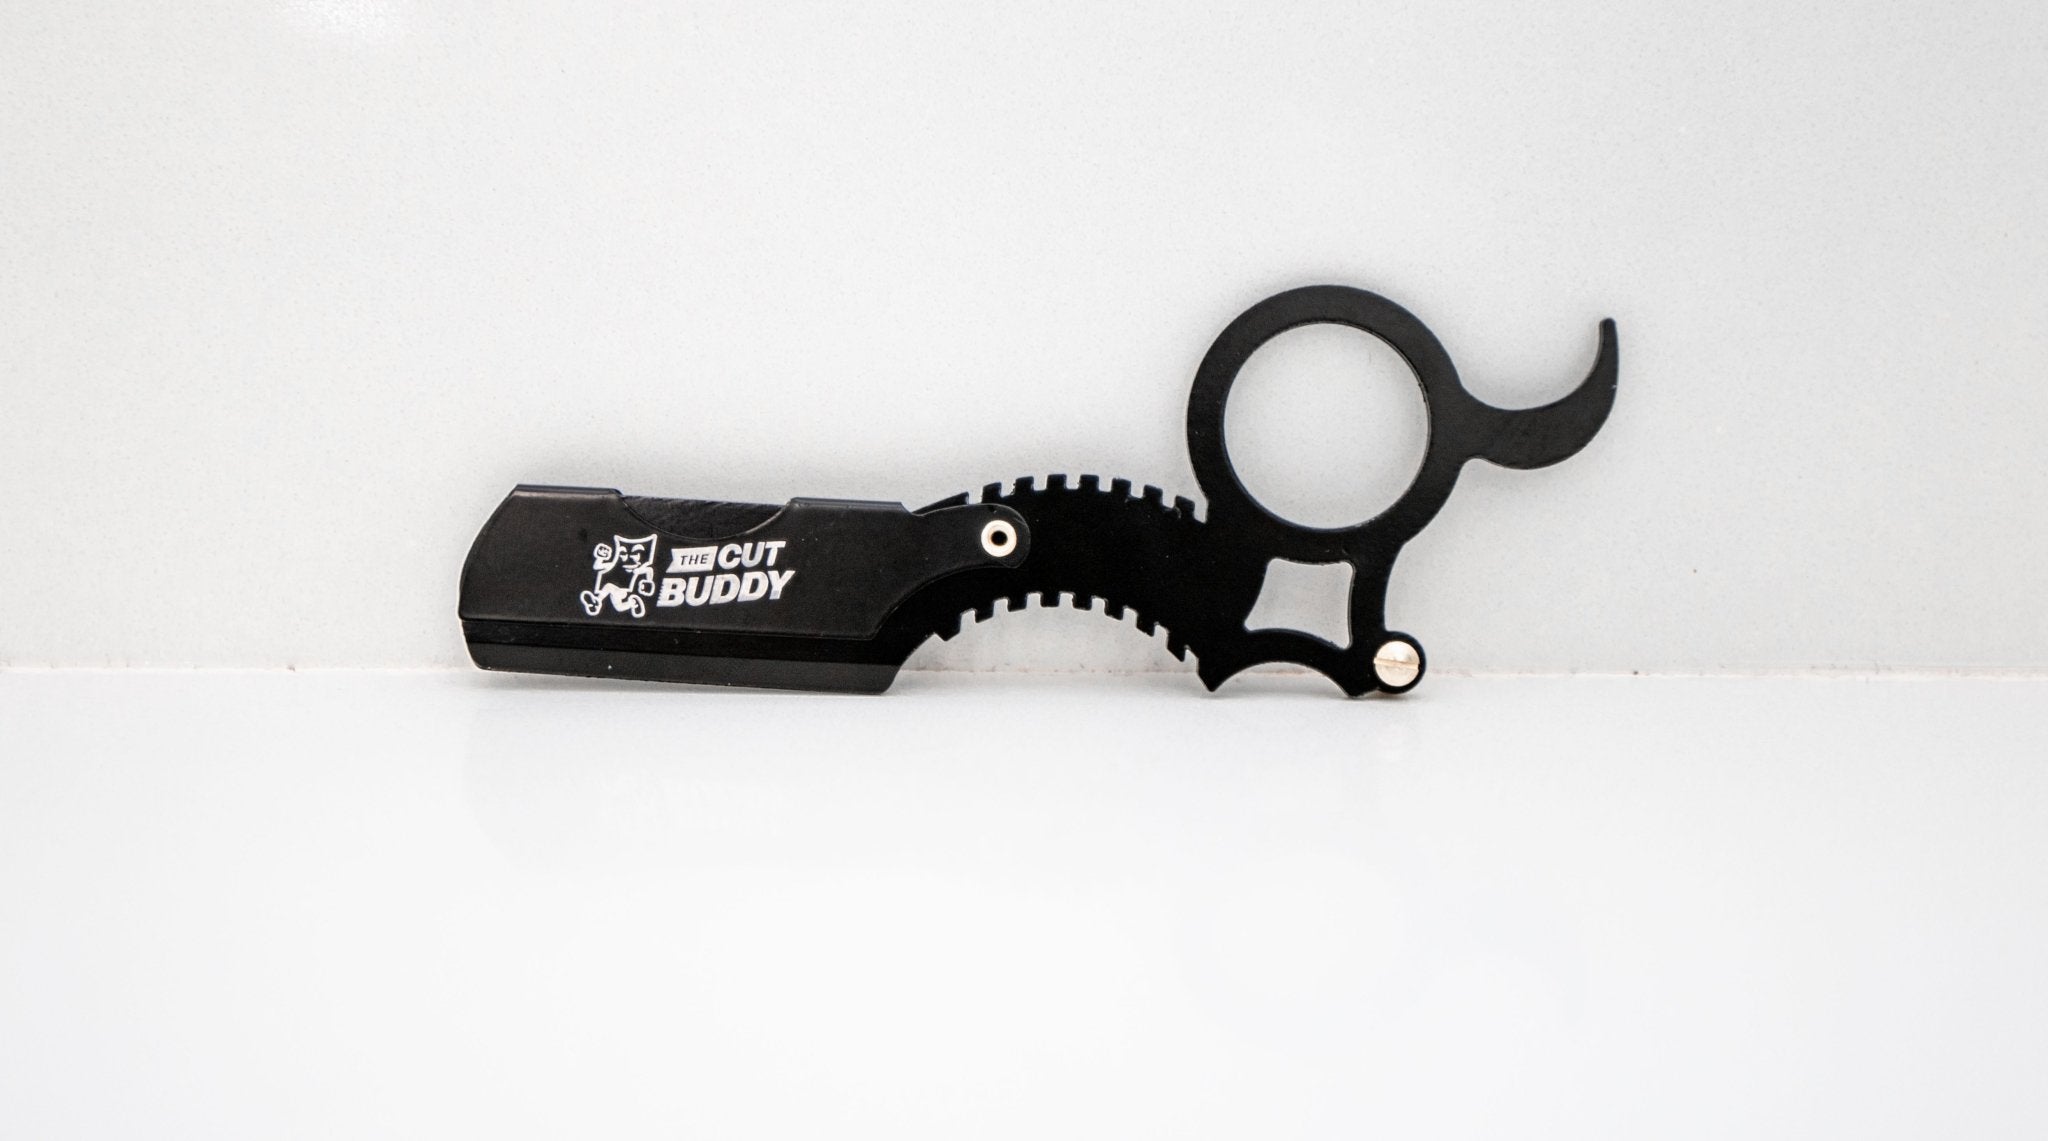
Cut Buddy University, we are back with a new tutorial on how to use the razor. Located inside of your all-inclusive Cut Buddy kit, you will find the Cut Buddy razor.
Let's jump into how we effectively use and hold a razor. Middle finger goes in the ring hole, ring
finger goes on or rests on the tang, index and thumb will sit above and below the shank, and you can lift open that shoulder or the flap to the shoulder. Carefully take a blade, place it on the edge of that razor. Be careful. You want to line up the grooves or the notches with the holes or the dents on the edge of that razor. Close that flap, lock in that flap, press that blade as well as the edge of that razor blade on a hard surface to lock in the blade on that handle.
Let's jump into how you utilize the razor on yourself. At a 45-degree angle, you want to place the razor edge against and leading up to your line-up area. Before you start to graze that razor blade on your skin, make sure you're pulling at your skin with your thumb or another finger on your opposite hand. This is called keeping the skin tight. It's very important to keep the skin tight. It helps to avoid cutting yourself. When the skin is tight, that causes tension. And that tension, in this case, is very good, and it's helpful in preventing you from cutting yourself. It's very easy to cut yourself when you're using a very sharp equipment, like a razor blade. So utilize that same process at a 45-degree angle throughout the entire line-up area.
Let's take a look at how you use the razor on your clients. As always, clean the line-up area, make sure the skin is as dry as possible because it helps to create a nice, clean, crispy edge. In your all-inclusive Cut Buddy kit, there is the Cut Buddy line-up enhancement pencil that is included. Go ahead and take that out and use that to outline the edge of your client's hairline. For new barbers, it's a great idea to use that pencil to outline the edge of your client's hairline.
Take your razor, middle finger goes into the ring hole, pinky on the tang, index finger on the top of the shank, thumb underneath the shank. Pull out your client's skin, make it tight. At a 45-degree angle, place or drag the edge of the razor blade towards your client's edge-up. So you're going up to that white line. Scrape at the white line a little bit, it's okay. As long as you keep the skin tight, you should not cut your client. Try to have a comb or brush handy in the opposite hand because you want to be able to kind of brush off or knock off any loose hairs, or maybe the residue from the white line-up pencil, as you're dragging up to your client's hairline.
So you want to create that ash-like effect on your client's hairline, but sometimes it's still a little bit too much build-up. So take your comb, take your brush, and after you edge-up that hairline using the razor, just brush it down a little bit. Brush off any excess chalk line or excess hair that might be laying loose. Again, continue to hold your razor at a 45-degree angle, as well as holding the skin very tight at the same time as you're going through the motions.
When you're done using the razor, again take your comb or brush and just brush off any debris, any white line-up, any loose hairs. And then take your clippers, whether it's one of your sharpest clippers or the Cut Buddy clipper, and hit that line-up one more time, because we want the client to have that ash look effect on their hairline. You don't necessarily want to see too much of the white chalk line, but you do want to create that effect of having that straight, crispy hairline. A little detail work never hurts. Go ahead, grab that razor one more time, pull at your client's skin, make it nice and tight, and go ahead use that razor to edge-up one final time. You'll repeat this same process on the opposite side of your client's head.
Here we have it ladies and gentlemen, the complete look using the Cut Buddy razor. Here we have the finished look of the client's front hairline and beard line utilizing the Cut Buddy razor.
Tips From The Clip
In this video tutorial, one of our Cut Buddy experts demonstrates some straight razor techniques that are perfect for new barbers. Go ahead and check out the video for the complete tutorial. Then, review what you learned with our key takeaways list. Here are our tips from the clip:
- To hold the straight razor properly, place your middle finger in the ring hole, let your ring finger rest on the tang, and arrange your index finger and thumb so they sit above and below the shank.
- To attach a blade, lift open the shoulder and carefully place the blade on the edge of the razor. You want to line up the grooves of the blade with the holes on the edge of the razor. Then you’ll close the flaps on top of the blade and press both the blade and the razor edge on a hard surface. This locks the blade in place into the handle.
- To use the straight razor on yourself, you want to place the razor edge against your head at a 45-degree angle and lead it up to your line-up area.
- Make sure to keep the skin pulled tight when you’re grazing the razor blade on your skin. Keeping the skin held tight causes tension, which helps you avoid cutting yourself.
- Whether you’re using the razor on yourself or a client, always make sure the skin is as dry as possible. This will help you get a nice, crisp edge.
- The Cut Buddy line-up enhancement pencil comes with the kit, and it can be used to outline the edge of your client's hairline. Having a guideline is especially helpful for new barbers.
- When cutting someone else’s hair, try to have a comb or brush handy. That way you can brush off any loose hairs or residue from the white line-up pencil as you're dragging the razor up to your client's hairline.
- Sometimes creating an ash-like effect on the hairline can result in a bit too much build-up. To fix this, take your comb or brush and brush down the hairline after you do your edge-up with the razor. You should be able to brush off any excess chalk lines or loose hairs.
- Once you’re done using the razor and you’ve brushed off any leftover debris, it’s time to take the clippers and hit the line-up one more time. This allows you to give the client that ash-like effect without showing too much of the white chalk line.